Sonos technical support is great and if ever you have an issue, I highly recommend giving them a call. However, here’s what you can do yourself to achieve best performance from your Sonos system.
This is useful if ever one of your Sonos devices struggles to stream content from the Internet or is very laggy to control using the app.
The Sonos system can give you diagnostics via your web browser. To do this, you will need to find the IP address of any one of your Sonos devices (except Sonos Bridges). You can do this by checking your wireless router’s connection table. Once you have found a device IP, you can check diagnostics by visiting this URL in your web browser:
http://<device ip>:1400/support/review
For example:
http://172.20.0.246:1400/support/review
This lists all of your Sonos devices and all of your controller devices. There’s some interesting info under each one but the best view is the “Network Matrix”. Below is a screenshot.
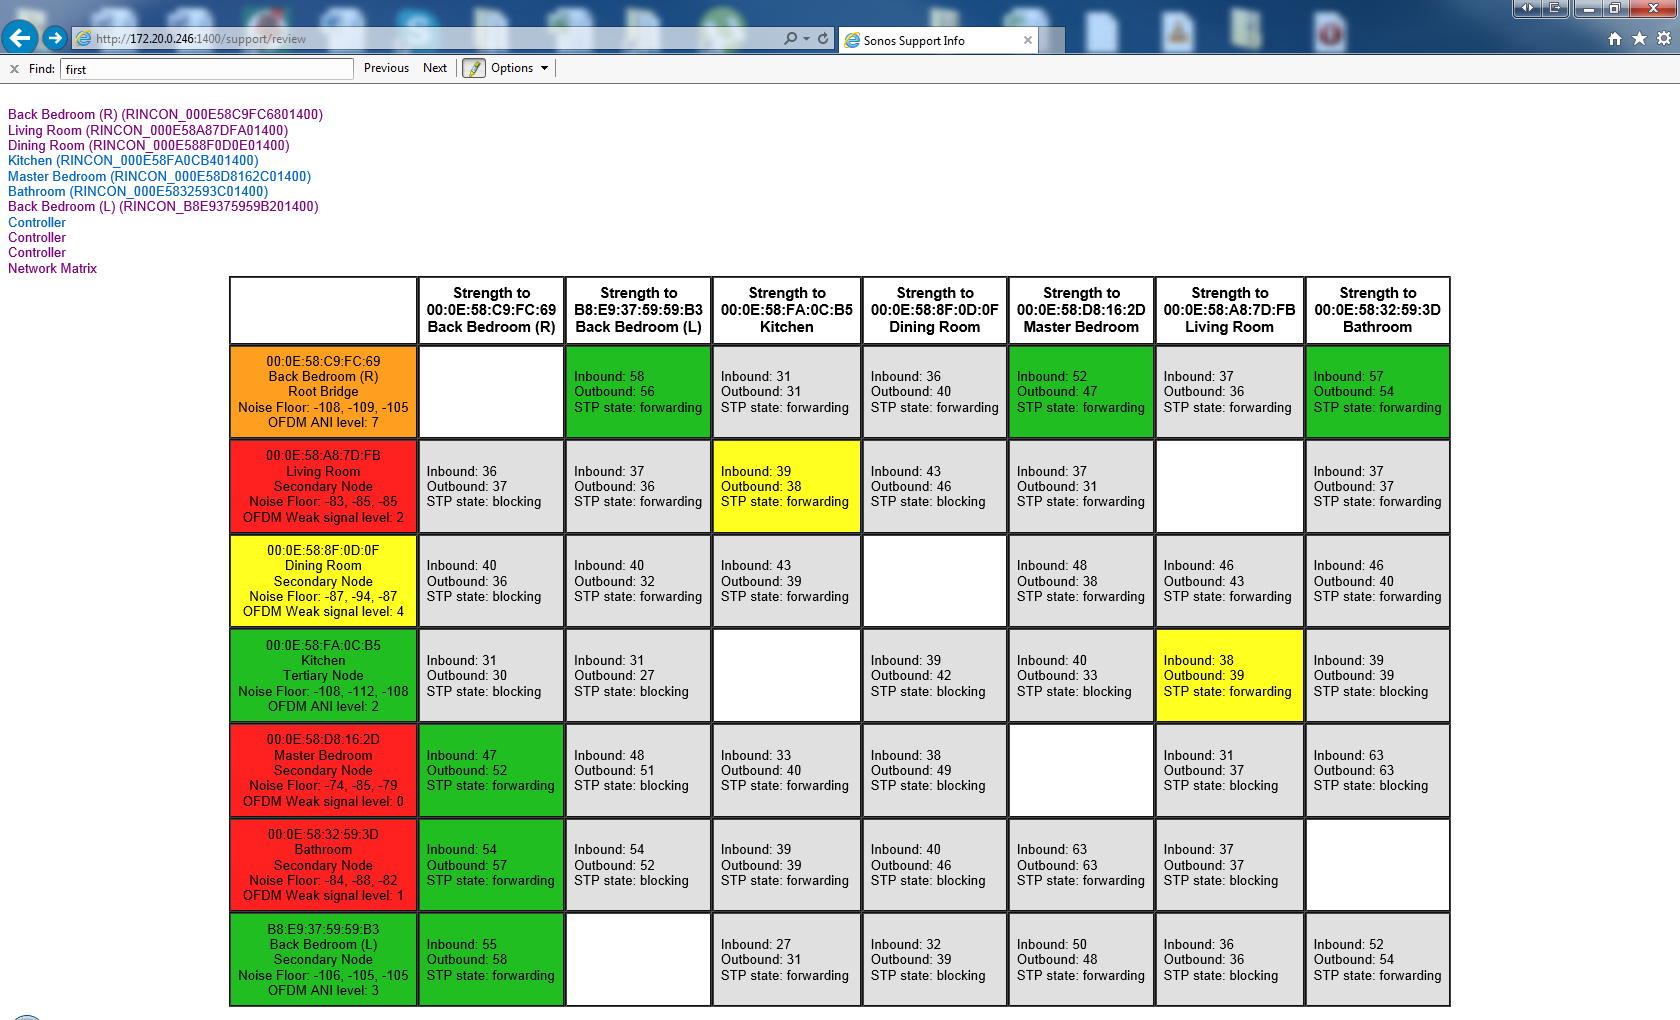
There’s a few things to note here:
The Root Bridge
In the left column, one device will say “Root Bridge”. Sonos support inform me that this device is best set as the one which is most central to the premises and is hardwired to the network. This can be any Sonos device, it doesn’t necessarily have to be a Sonos Bridge. To change the Root Bridge, follow these steps:
- In your web browser, go to http://<device ip>:1400/advconfig.htm and “disable” the “FirstZP”. <device ip> in this case is the IP address of your current Root Bridge. It doesn’t appear that this page reflects the current state so it’ll likely already have “disabled” selected. Just press the “Submit” button.
- In your web browser, go to http://<new device ip>:1400/advconfig.htm and “enable” the “FirstZP”. <new device ip> in this case is the IP address of your desired Root Bridge.
- In your web browser, go to http://<new device ip>:1400/reboot to reboot system system. <new device ip> in this case is the IP address of your desired Root Bridge.
The Colours
The colours in the leftmost column indicate the level of noise and interference directly affecting that Sonos device. The colours go Red, Orange, Yellow and Green to signify a scale of really bad to really good respectively. The colours on the main cells of the table indicate which Sonos device is connecting to which other device in order to form the Sonos mesh network. In the screenshot above, you’ll see that Master Bedroom is connecting to Back Bedroom with a very good connection.
You’ll also see that the noise and interference surrounding living room, master bedroom and bathroom is very bad. The most common solution to this, so I’m told, is to change the wifi channel. This assumes you’ve already set the best device as the root bridge.
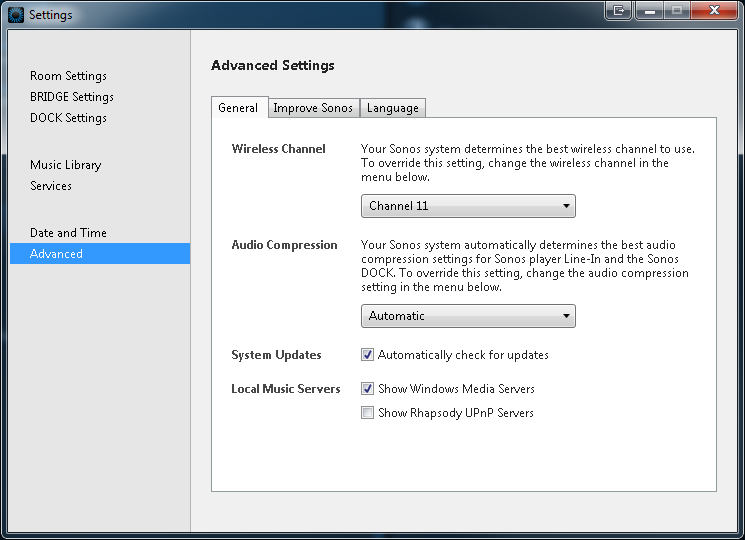
You can change the wifi channel in the Sonos desktop controller application by going to Manage->Settings->Advanced.
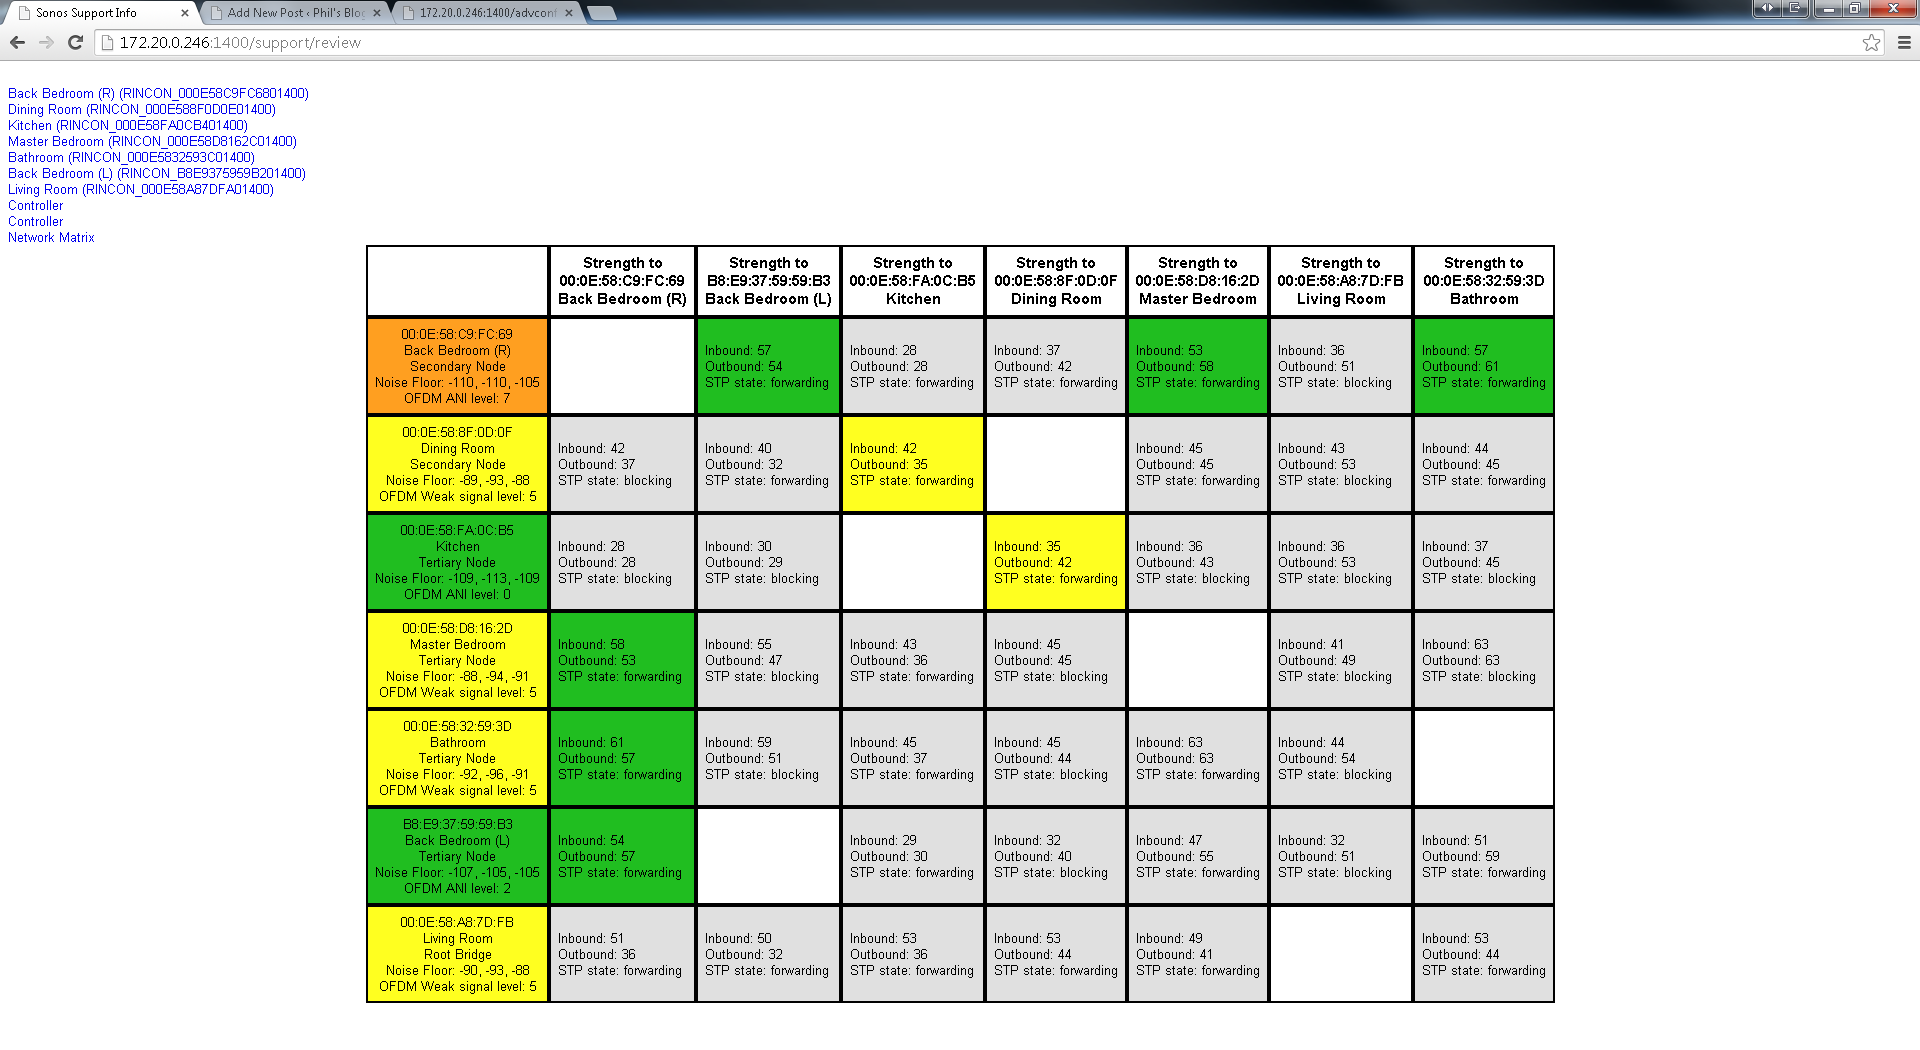
In my case, changing the channel from 1 to 11 improved things massively:
Thanks! This is very helpful for rebooting mounted Sonos.
are you sure that the http://192.168.1.XXX:1400/support/review is still working after the latest updates (June 2016)
Looks OK here. Just upgraded my system from 31.3-22220 to 32.11-30071. Still seems to work ok.
I had the same problem, if you select the bridge ip address then the network diagnostics will not display, just use the IP of one of the other devices and it will work fine.
That makes sense. I’ve never used a bridge as one or more Sonos devices has been directly connected to the network. The bridge is redundant now, anyway, since Sonos enabled native wi-fi support