
Intro
Looking around online, it seems this unit breaks a lot. Mostly the cause of the breakage seems to be the USB charging port on the back. It seems to wear out and bend/snap, making it impossible to charge the unit.
Replacing the USB port isn’t too tricky if you’re moderately competent with a soldering iron. Here’s the steps:
Disassemble the Monitor
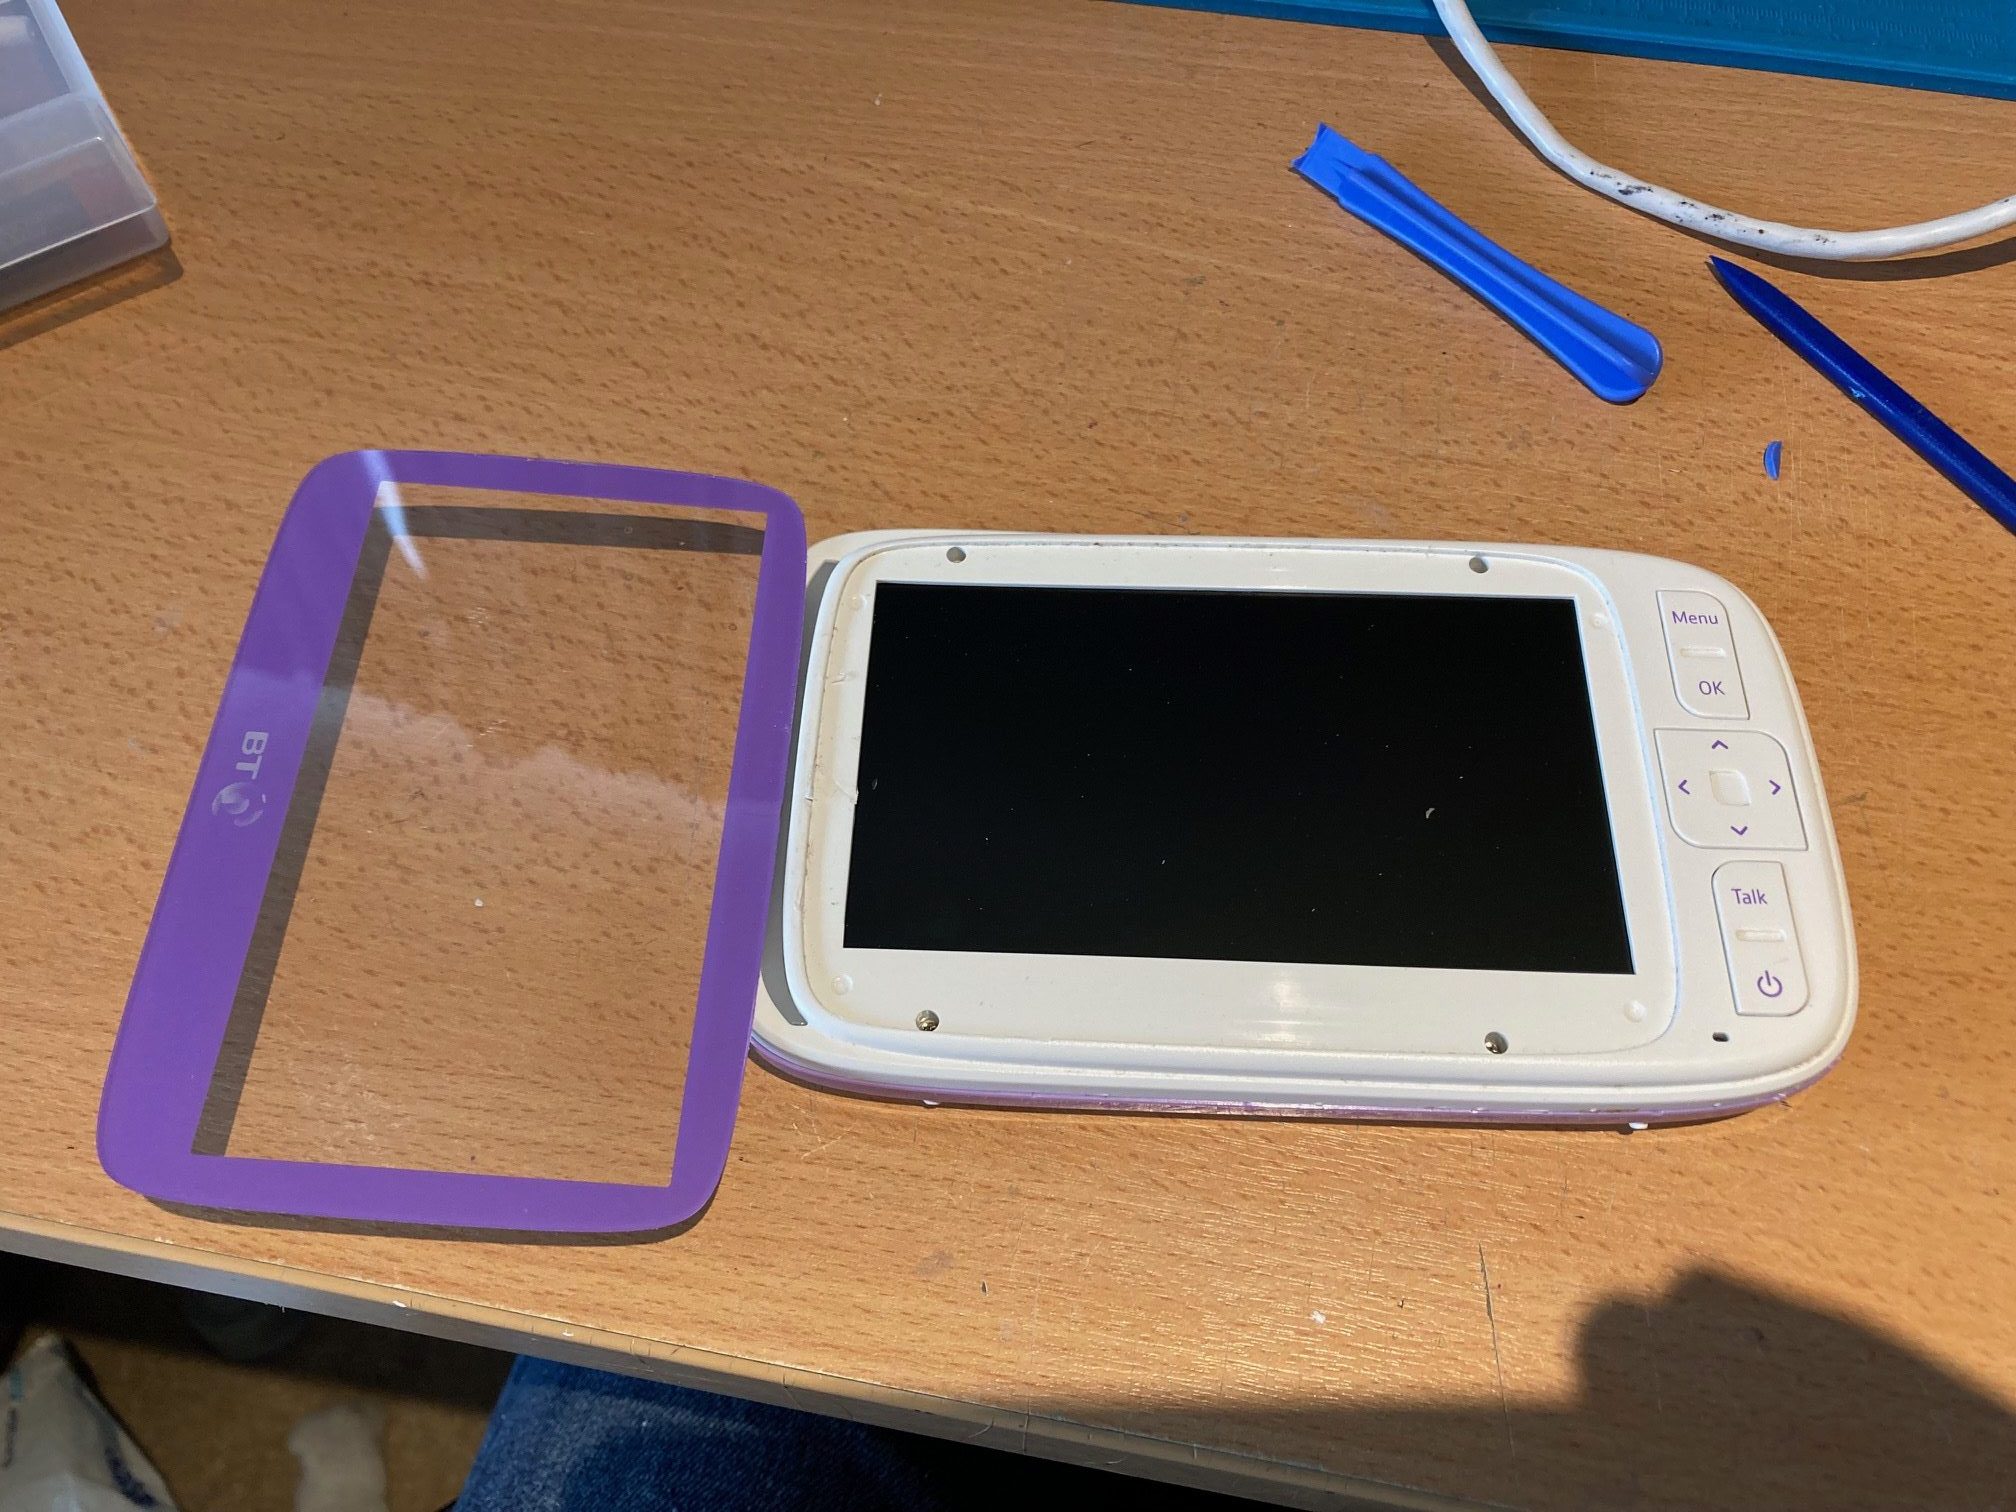
The part with the purple surround on the front of the monitor is just a glued on screen cover. It’s only glued around the edge – not to the screen itself. Heat it up a bit with a hair dryer or heat gun to loosen the glue and gently pry it up away from the screen. This will reveal 4 screws:
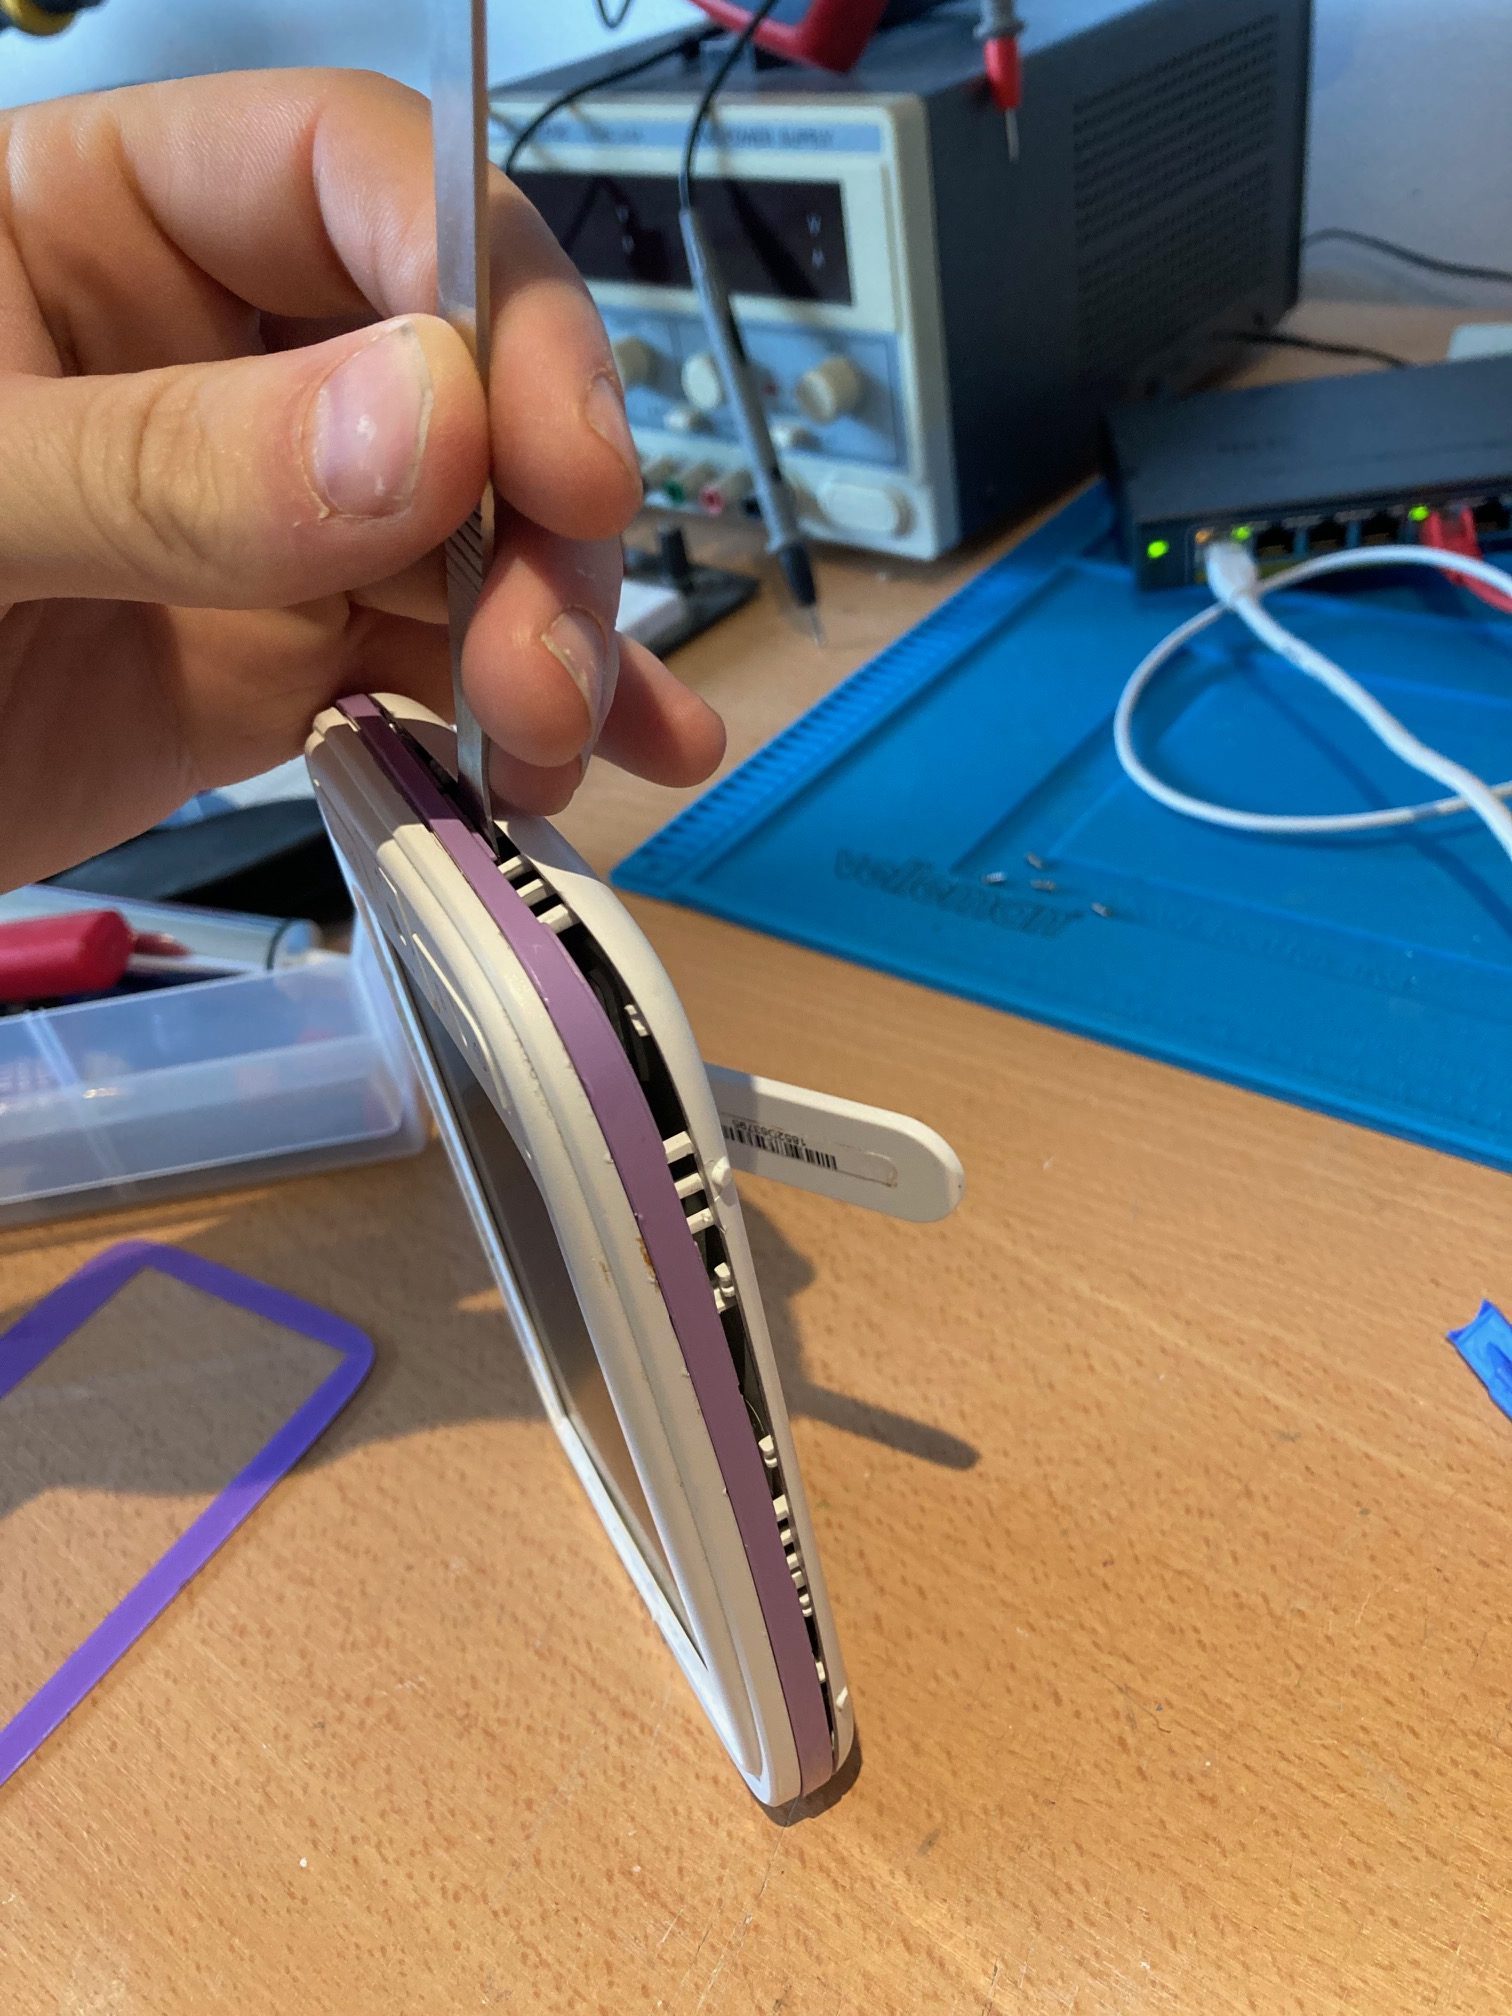
Remove the 4 screws and you can now gently pry between the purple band and the back of the unit to remove the back cover:
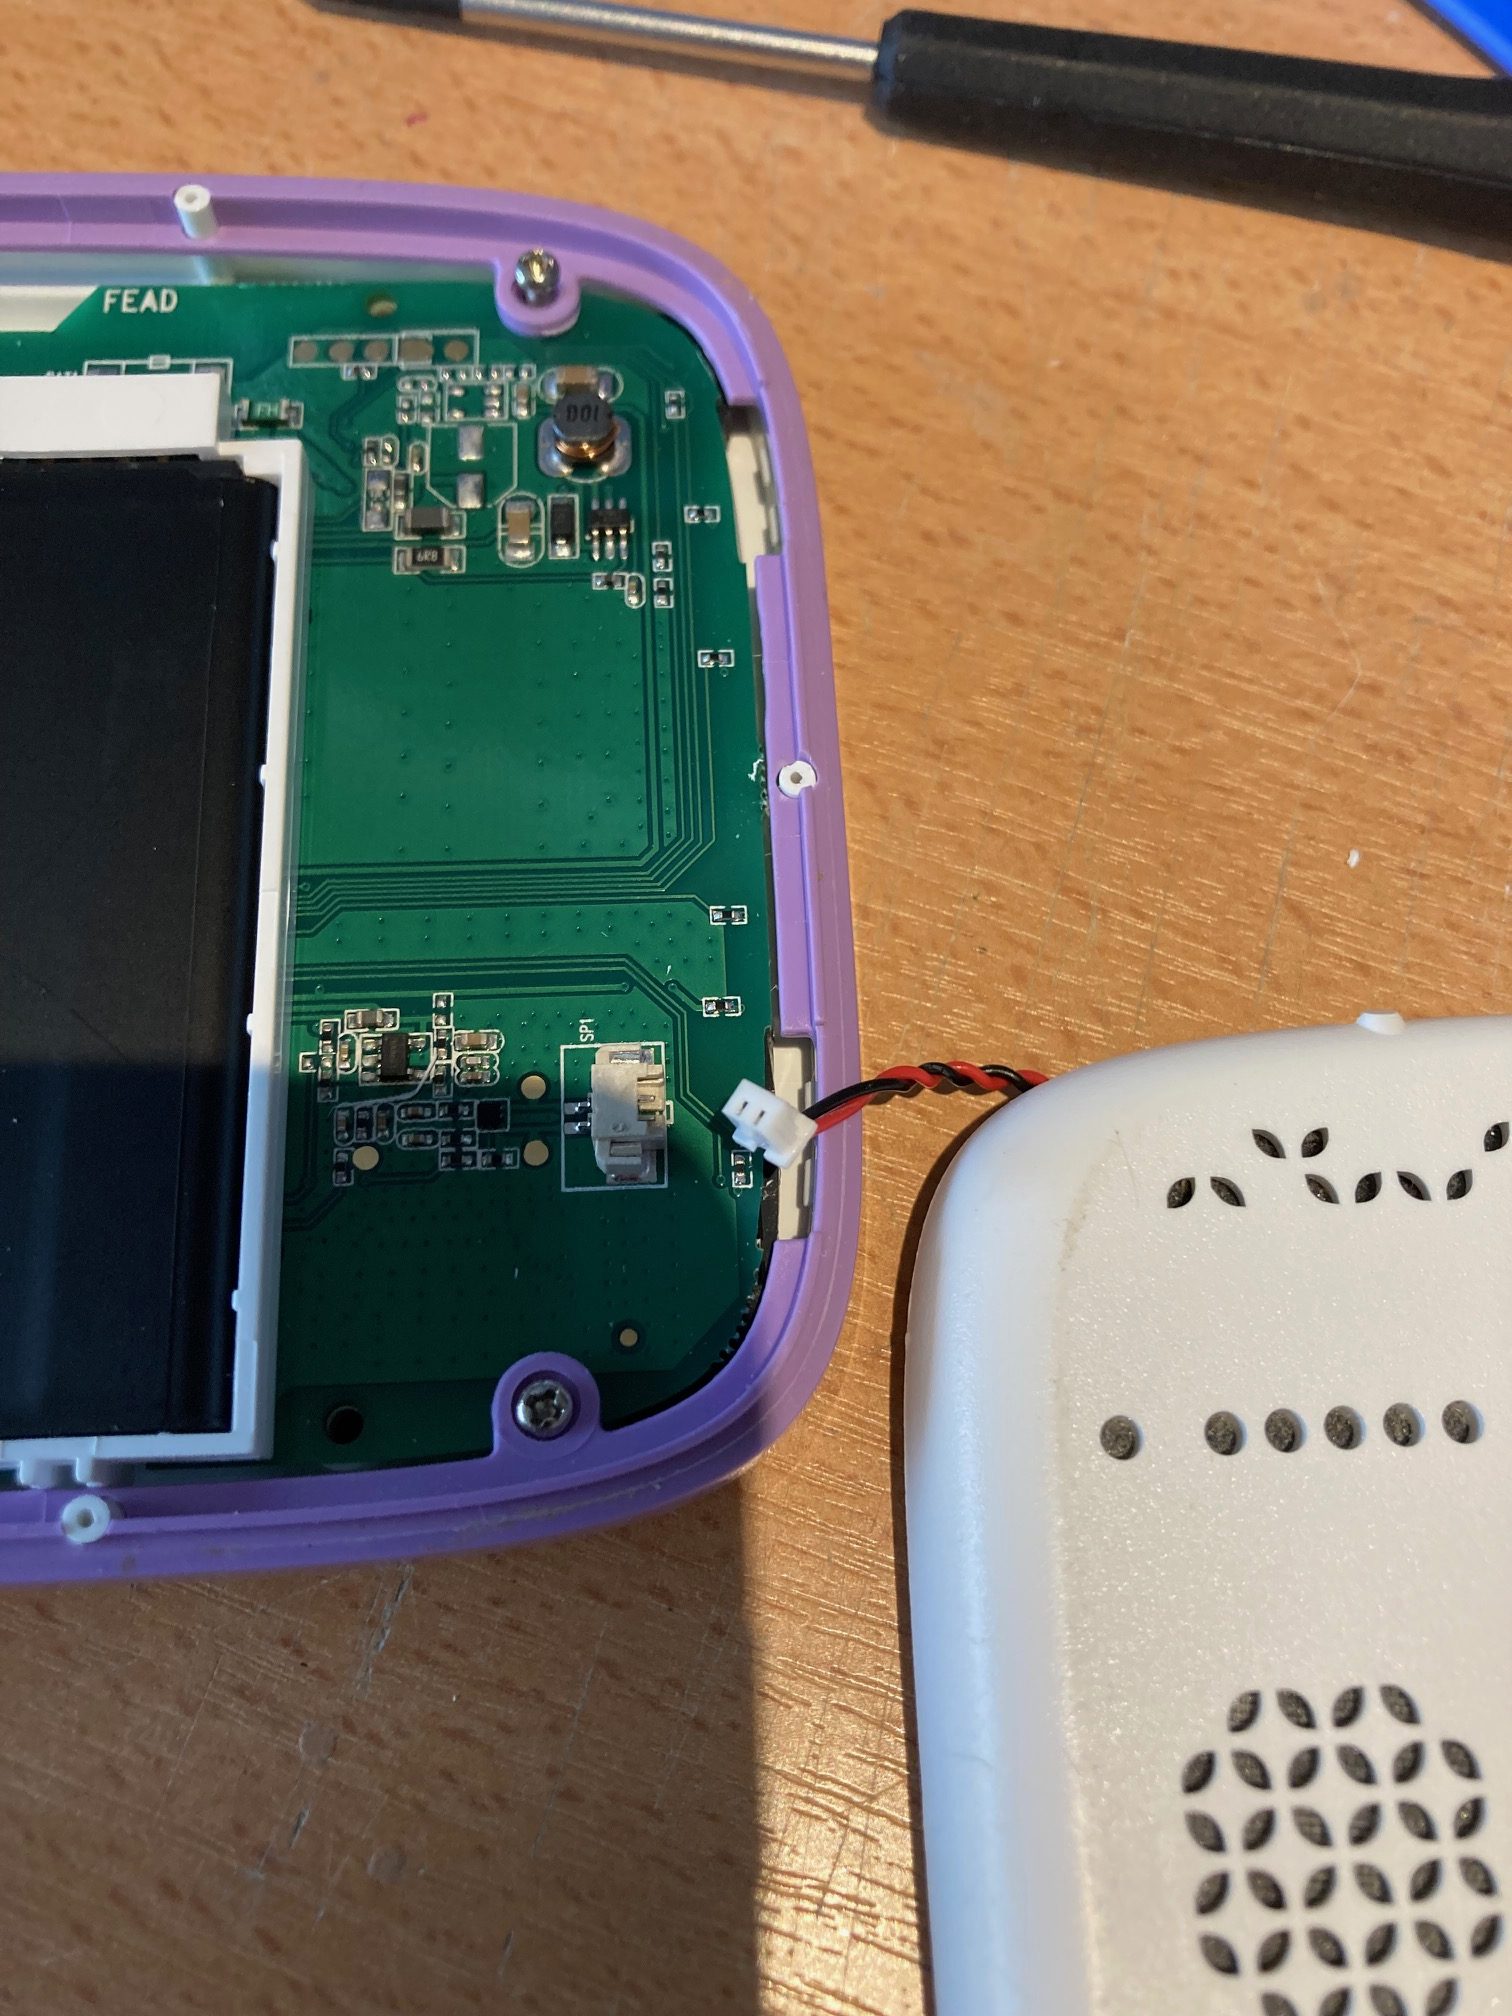
Unplug the speaker to fully remove the rear cover:
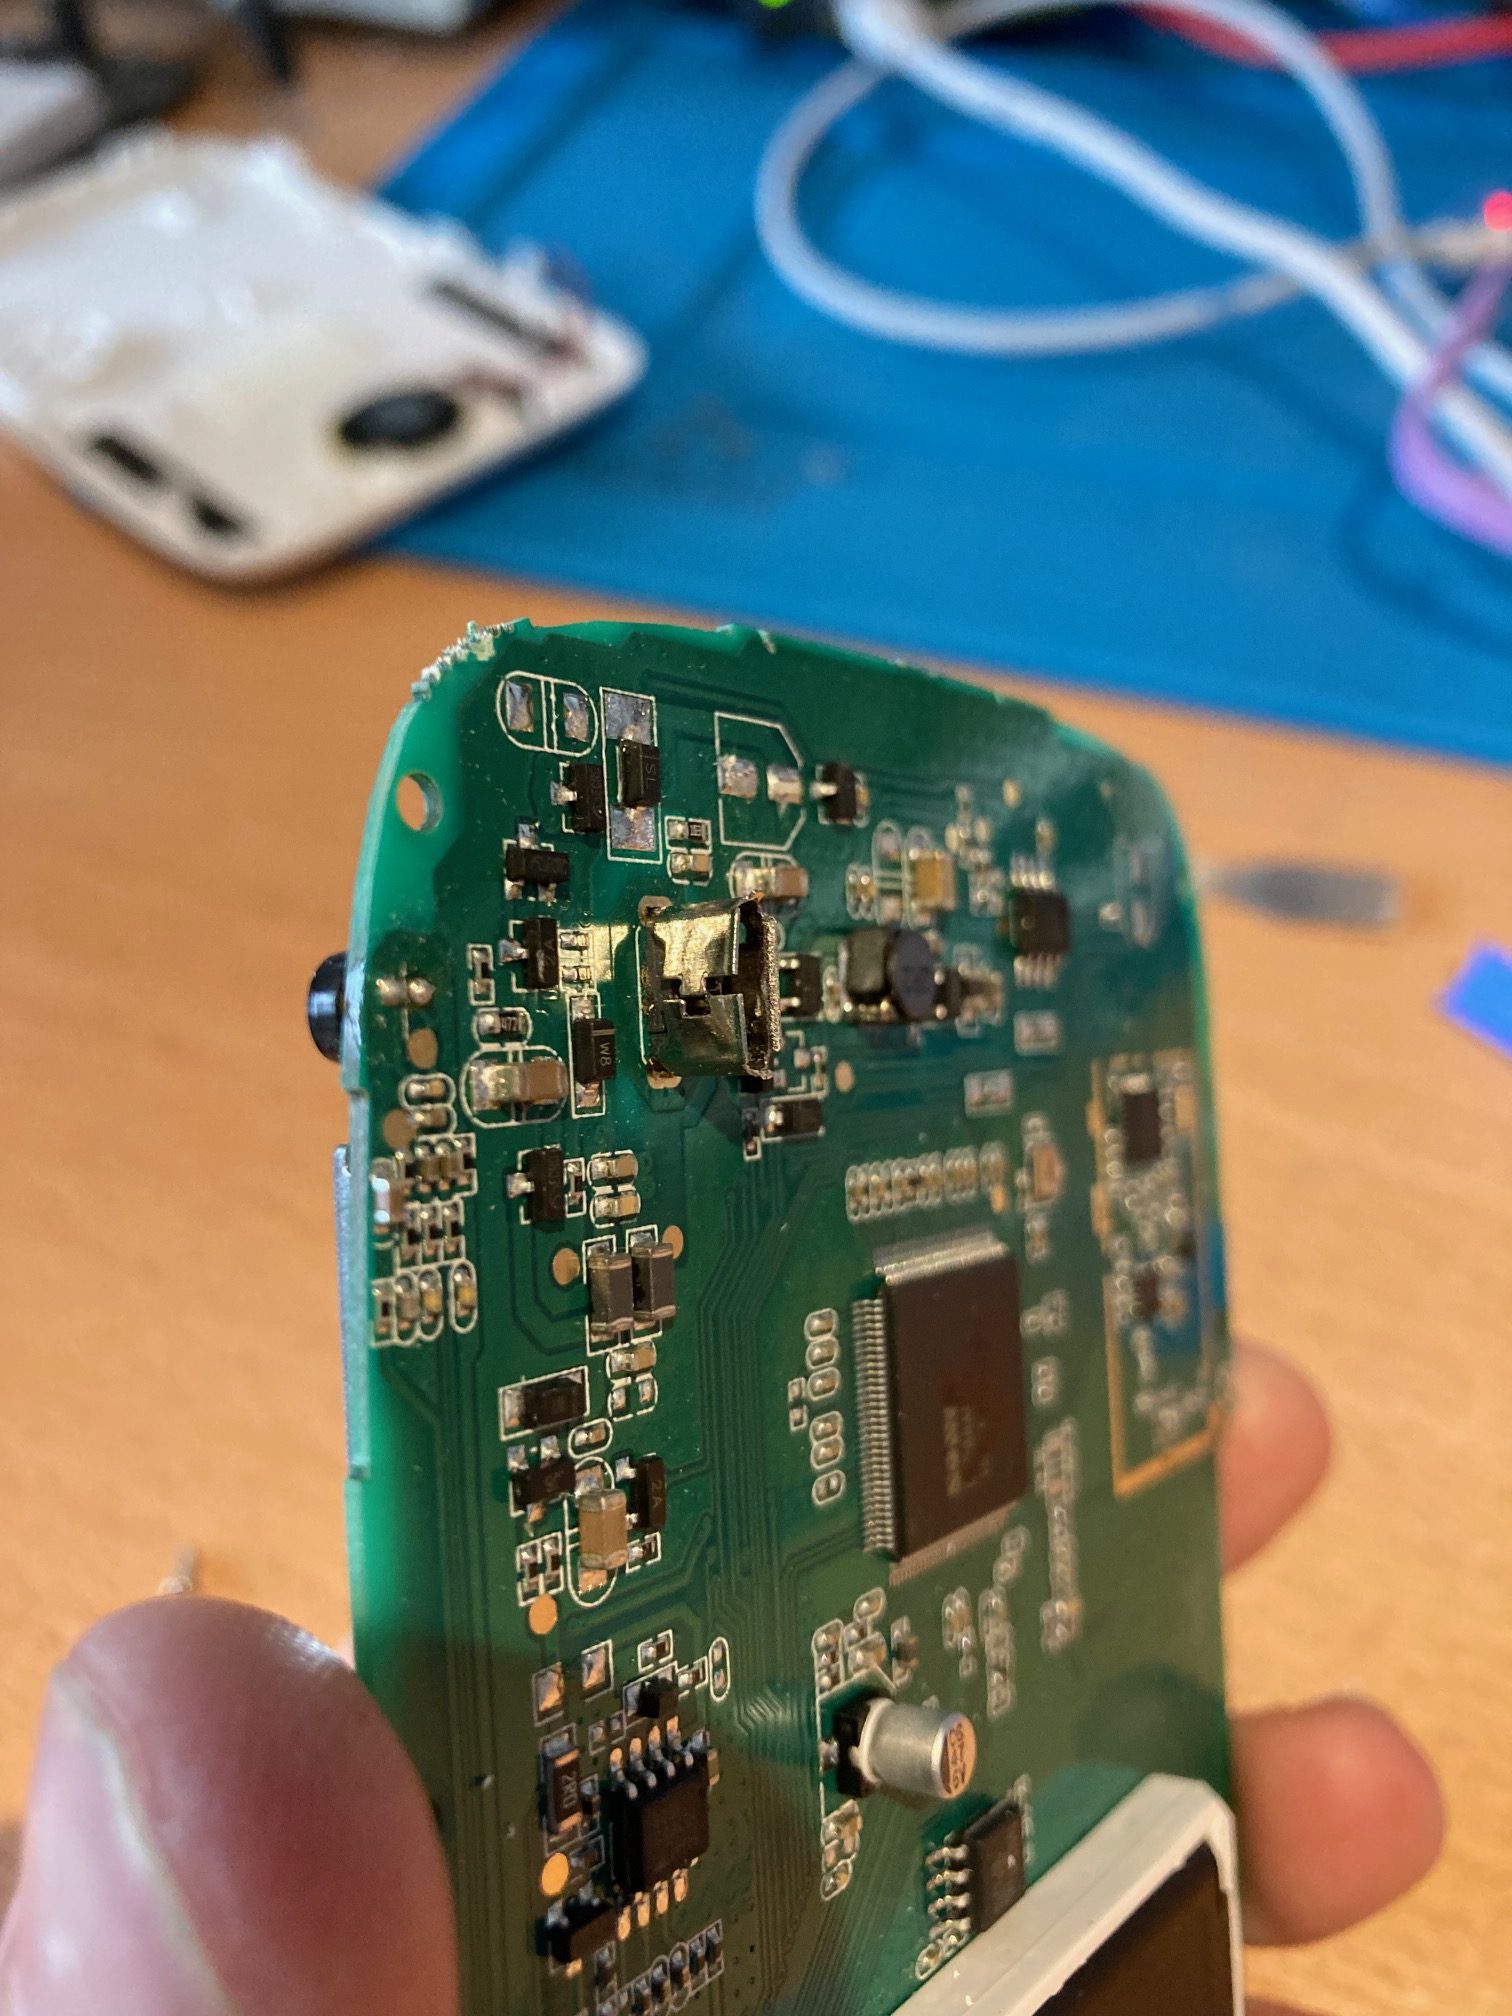
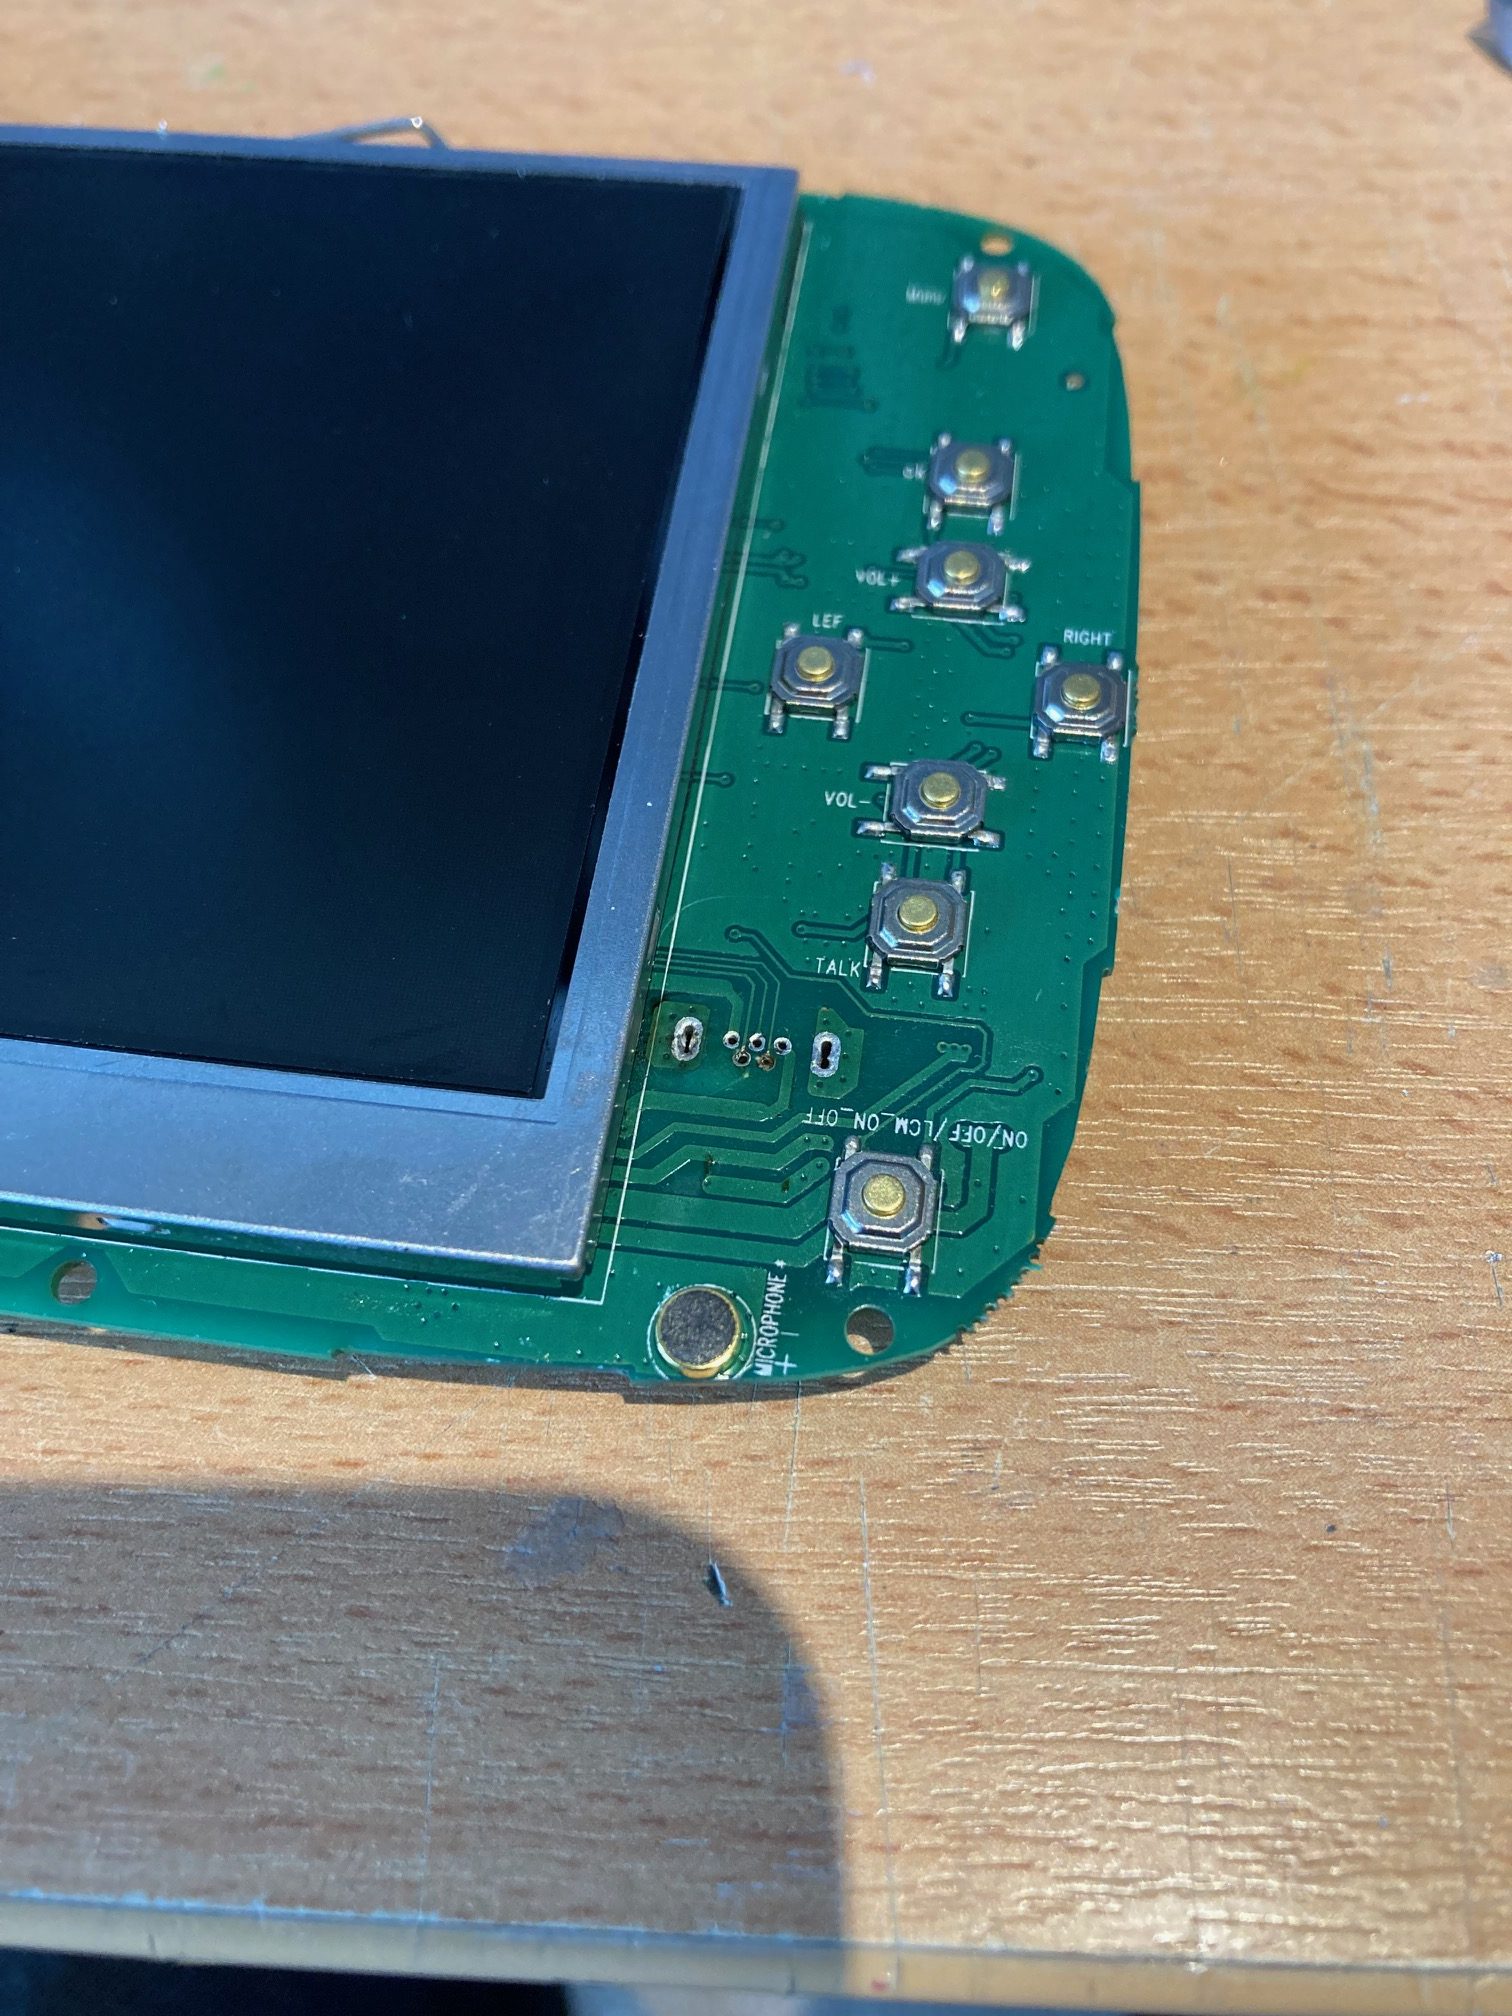
You can now remove the 4 internal screws which secure the purple plastic surround and then lift out the board. You can see on this one that the USB port is bent – the inside is also snapped:
Carefully desolder the USB port from the board. There’s 7 points of connection – the 5 pins of the port and two securing pins at either side. I started by heating the solder of the securing pins whilst pulling gently at the metal part of the port. Once the metal was off, I individually desoldered each of the 5 pins – pull a pin up with pliers and heat up its solder.
Once all the pins were out and the plastic bit was removed, you can clean the solder out of the holes with a soldering iron and solder sucker:
Reassemble It
Now you need to find a replacement Micro USB Port. Here’s what it needs to look like:
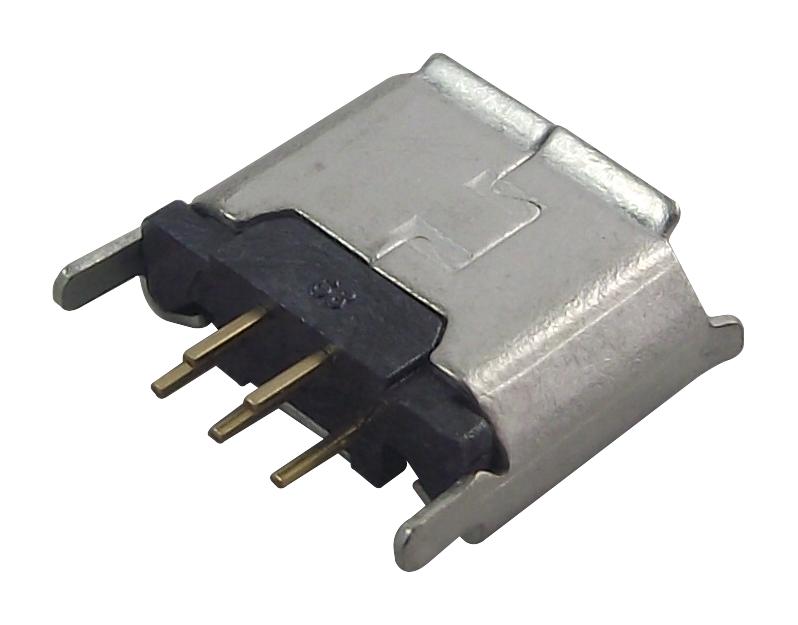
Here’s the datasheet of the one pictured: 614105150721. Note the dimensions – you need to make sure the height is pretty close to the original (7.1mm).
You can get them for 10 a penny on AliExpress, eBay, etc. but they’ll come from China and will take a while. At time of writing, Farnell sold the right part but once you add shipping et al. it’s not cheap.
EDIT: As some comments have said, you can get them on eBay specifically listed for the BT 5000/6000 monitor.
Once you have the connector, just solder it on in the right place. Here’s how it looks, before soldering, under a microscope:
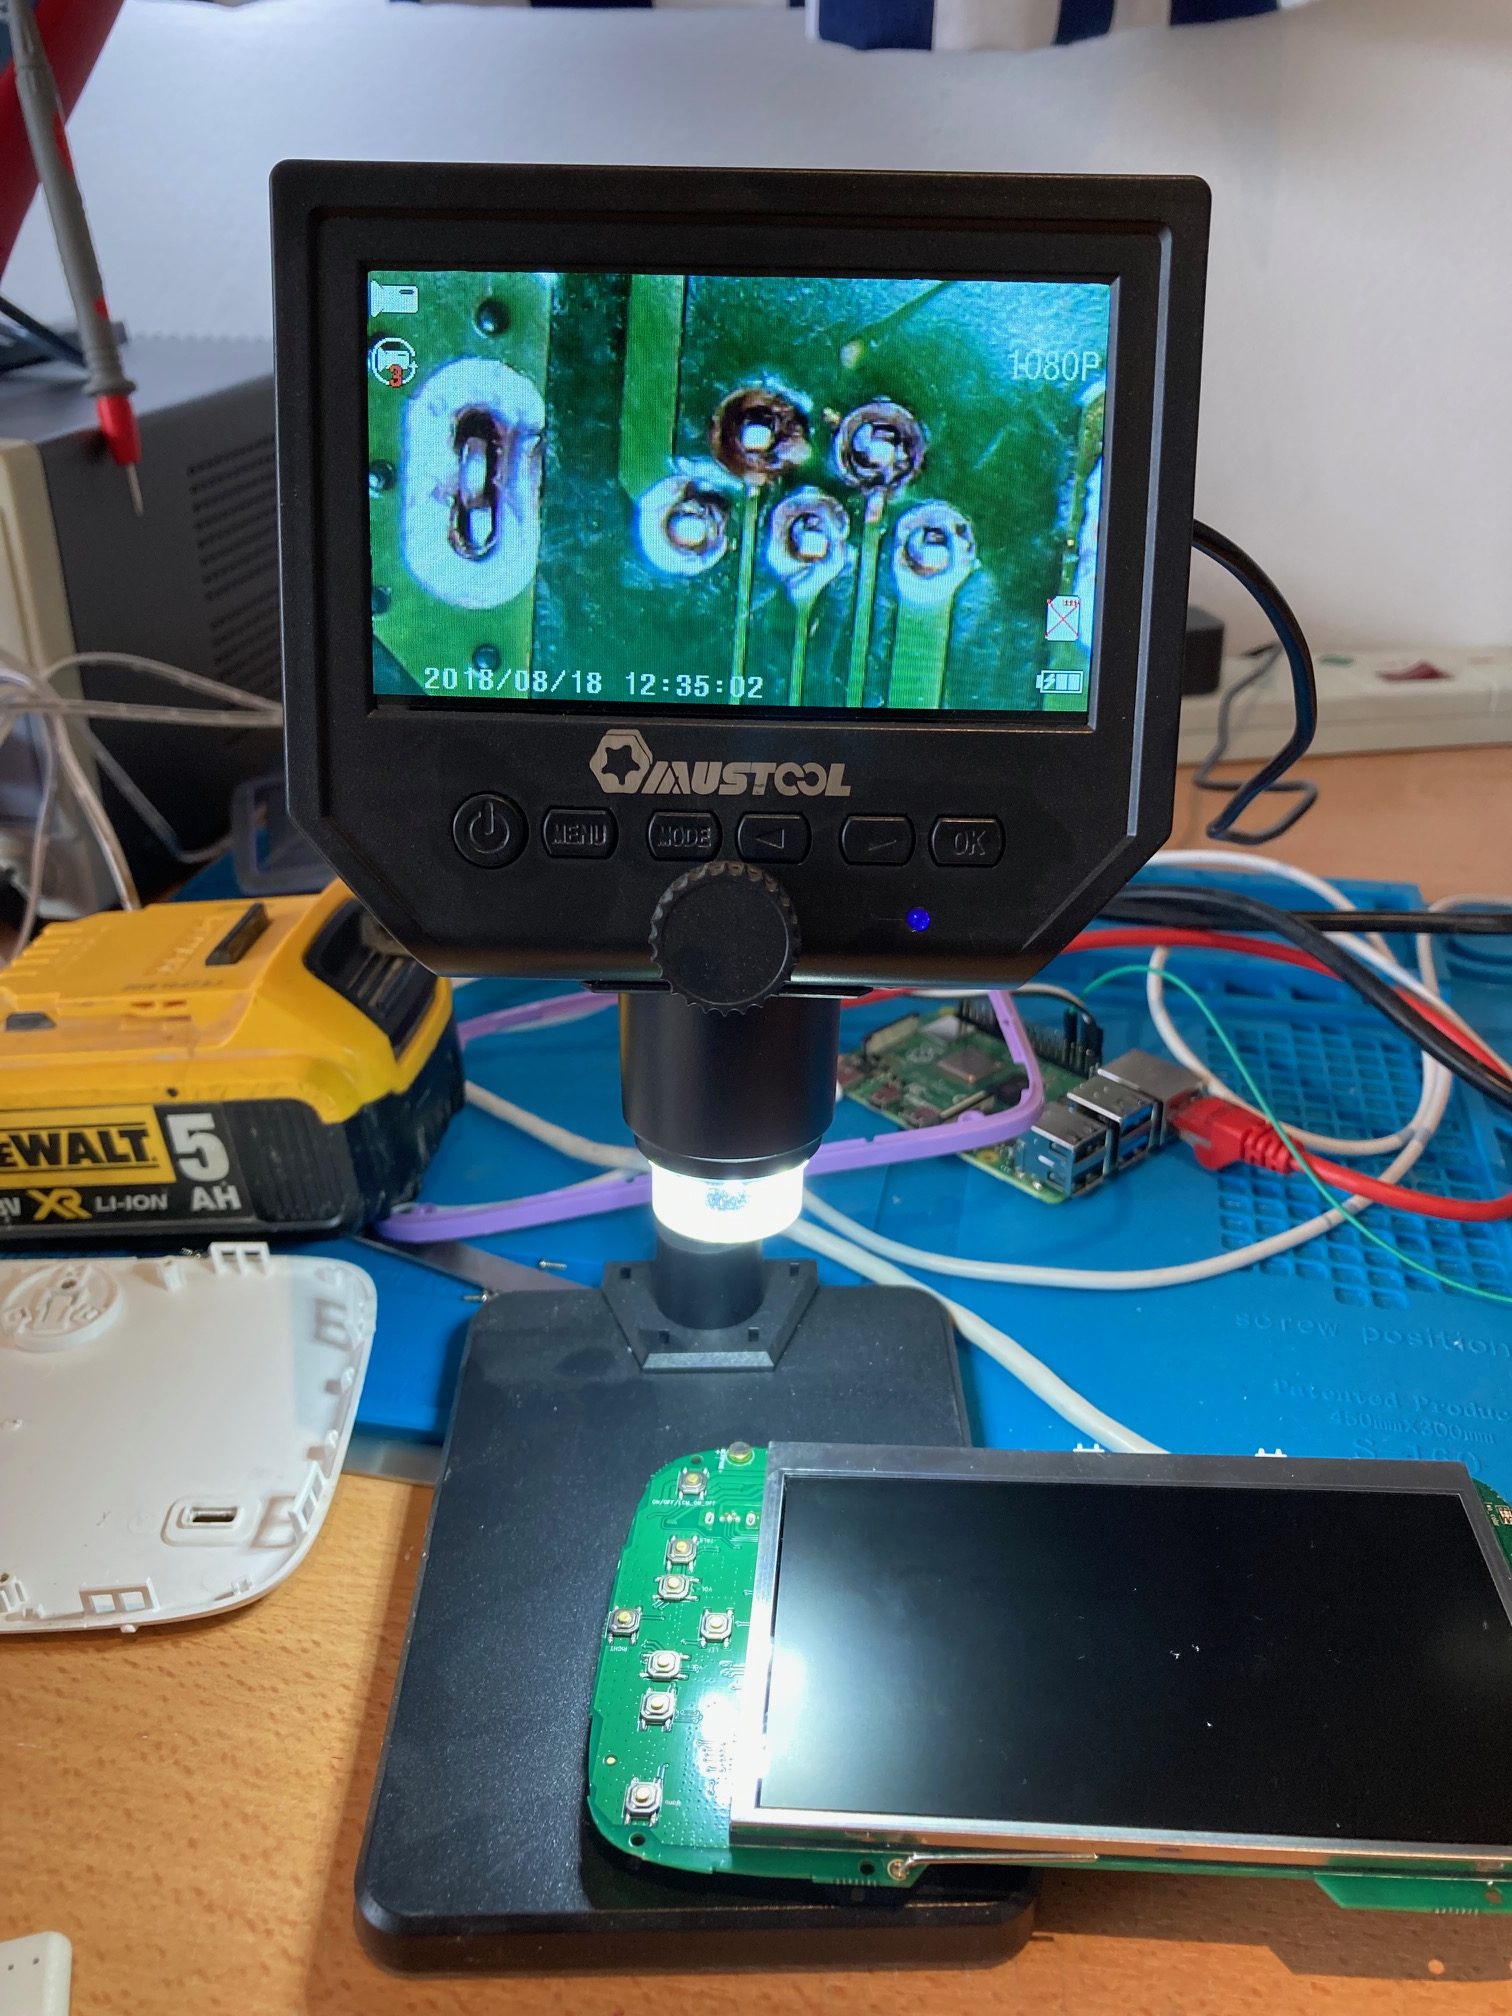
The large outer pins are just to keep the port stuck to the board securely. The key pins to solder, for charging, are the ones with the larger PCB traces on the left and right of the set of 5 pins. These are 5v and GND. The 3 middle pins are data pins so only strictly required if you want to connect the monitor to a computer and upgrade it, or something (I’ve never tried this). Either way, try to solder all 7 pins securely, if you can. I used a very fine (0.3mm) solder and put a bit of flux on the board before soldering.
Test
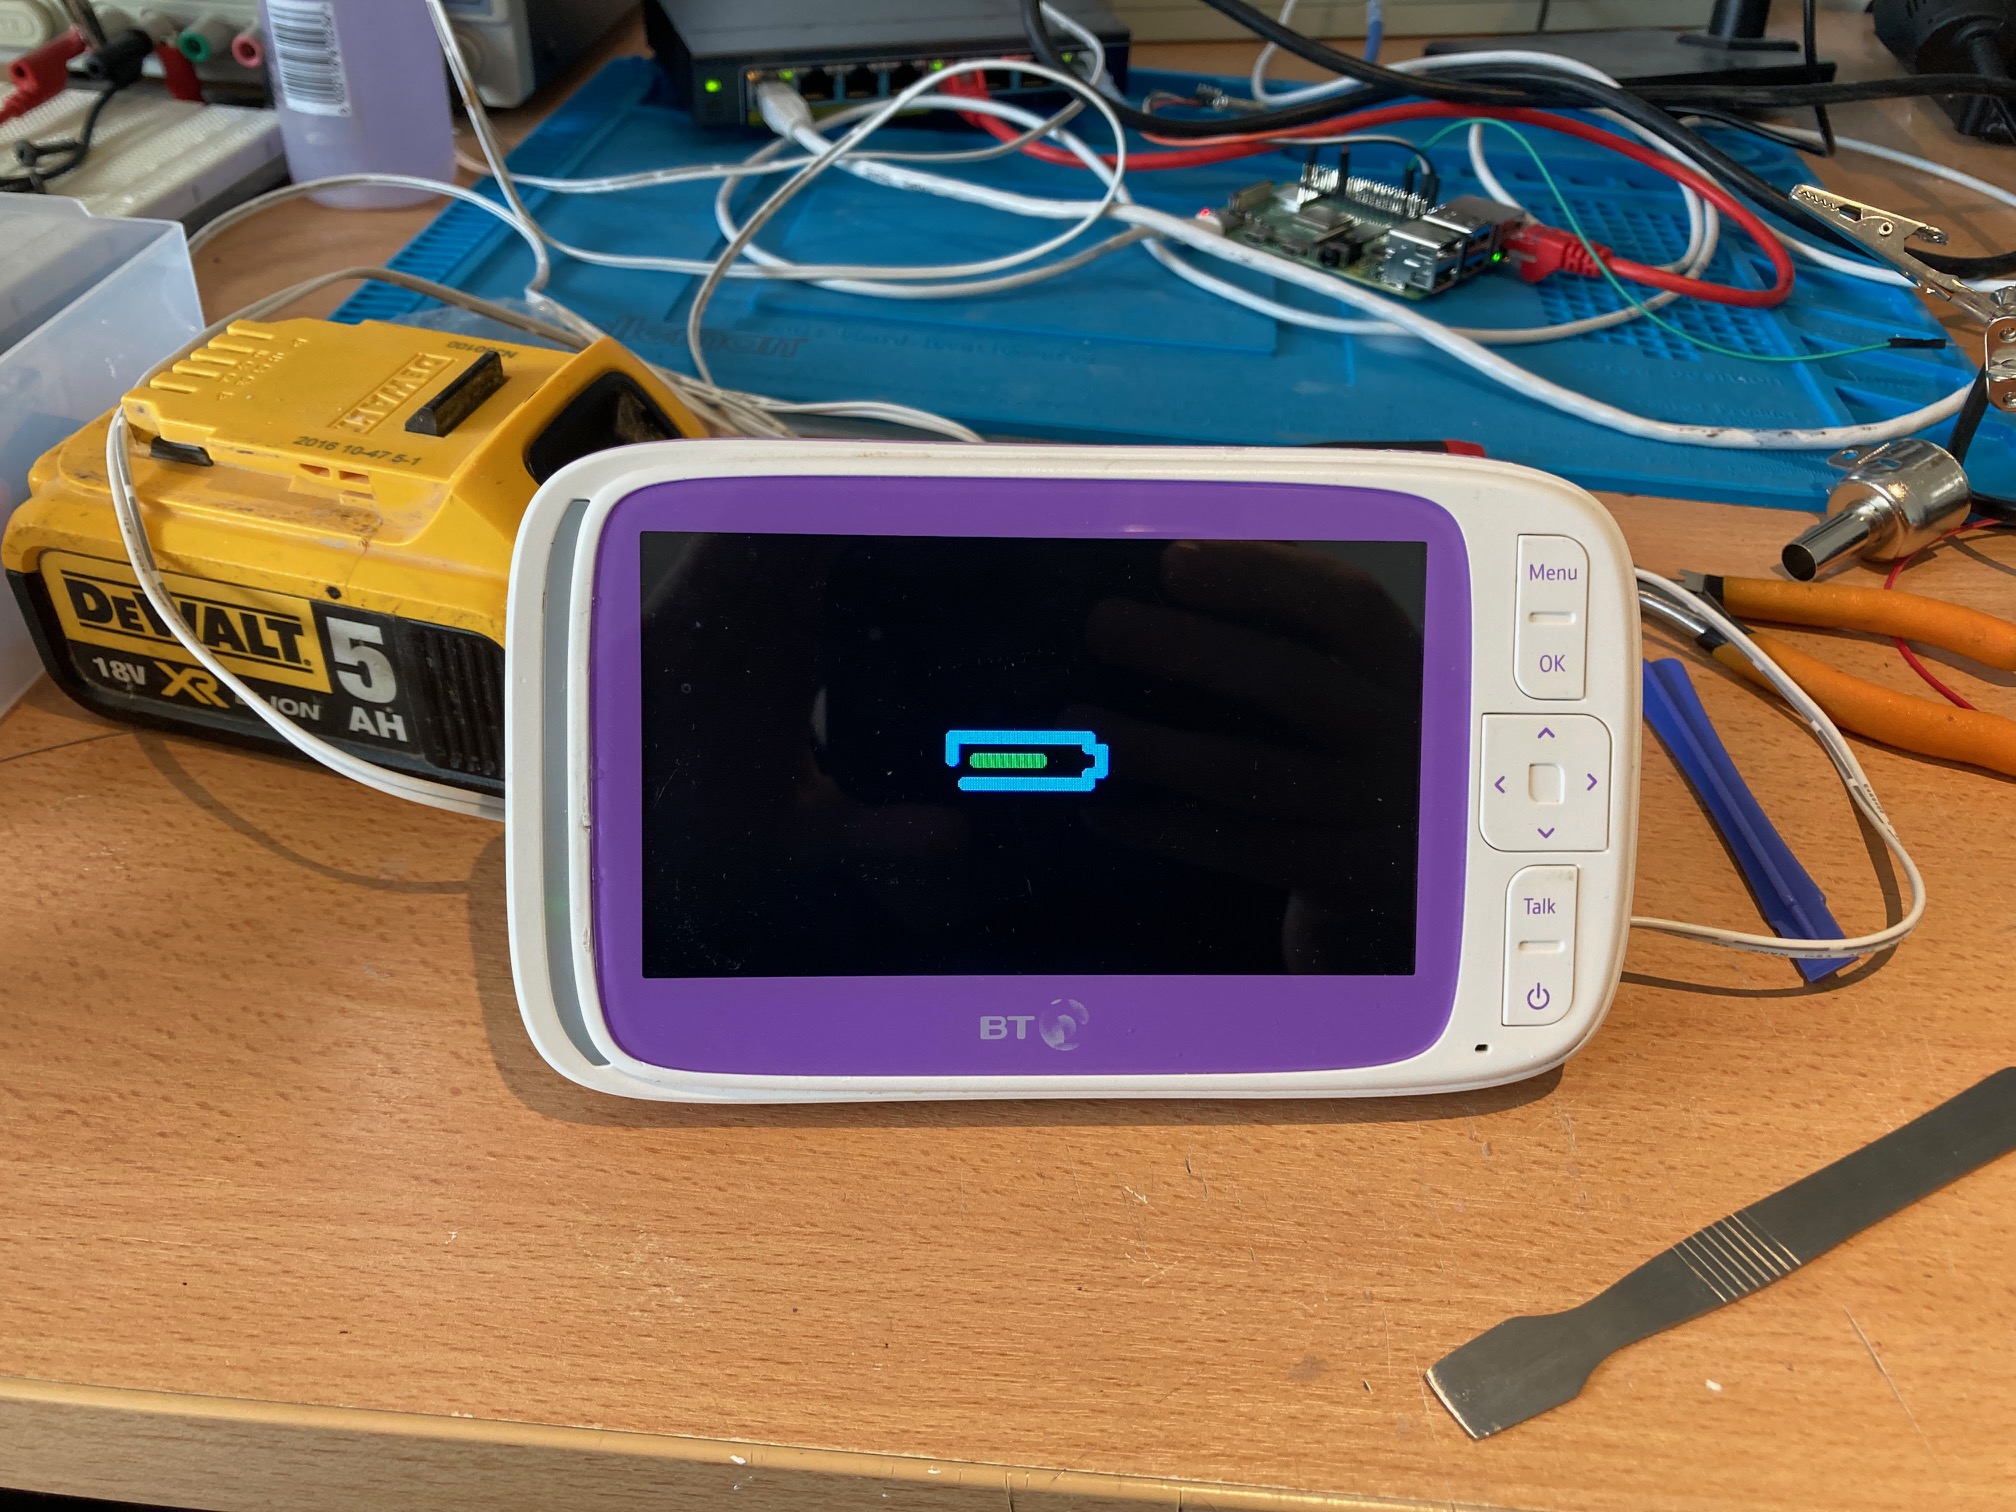
Once you’re done, put the monitor back together and it should charge as expected:
Fantastic! That was a big help. Thanks Phil.
A great guide, which I attempted to follow with limited success. This baby monitor is a poorly designed product and I assume it has a very high failure rate due to the USB port because there are sellers offering a repair service on eBay. The cage of the USB port is the only thing maintaining the tension on the connection and it is only folded shut, not soldered or glued. The leverage of the charging connector forces the cage open and makes the connection very loose.
The replacement port can be found on eBay for about £3 a pop, specifically advertised for BT 5000/6000. I also bought solder sucker, solder flux and .35mm solder for about £11 total. When I tried to de-solder the connector I found that it was almost impossible with a regular soldering iron. It seemed to burn up the board a bit instead. Perhaps I need a smaller tip on the soldering iron. I gave up and instead pressed the cage of the port back together and added some solder to try and stop it coming apart again. It seems to be better but the connection is still intermittent. Another idea I had would be to buy a 90 degree micro USB adaptor and thoroughly glue this in place on the back of the monitor when it is in the perfect position to maintain a charging connection. This was mean the stress of future disconnections and connections is removed from the original USB port.
If I was to do this again I would use a heat gun and perhaps solder paste due to the tiny connections.
We have a 90 degree short cable taped to the back of ours – widely available on amazon / eBay, preventing any stress on the monitor charger socket.
Seems to be working – I decided to try this as we’re on our third monitor (luckily all replaced under warranty) but we’ve now had our second camera fail!
Thanks for the guide Phil!
Thanks Phil! Have been meaning to repair mine for a while but never put the effort into finding those screws!
Hi Phil!
Do you offer a service where you repair/change the visual screen on a BT 6000 baby monitor parent unit? Ricky
I’m afraid the day job and kids keep me a bit too busy to be able to commit to something like that. Sorry!
Excellent advice Phil, baby monitor is back working again.
Definitely worth a pint!
Thanks for the beer Michael! Glad the post helped 🙂
Cheers – saved me a few quid – beer sent your way!
Glad it helped. Thanks for the beer!
Hi Phil.
Great guide thank you very much
I got mine chargering again cause I have the blue light on but my screen doesn’t seem to be working anymore? Any ideas what could be wrong?
You don’t happen to know what battery it needs as a replacement, as thinking of replacing that at the same time!
These look about right: https://www.ebay.co.uk/itm/185090218761. I can’t attest to how easy it is to replace the battery but I would imagine it’s not too tricky
Okay, I got the battery out okay, you can wedge it out from the bottom. It seems to be stuck down with some glue/tape It’s labelled..
Model: I9300
Li-ion 3.8V/2100mAh 7.98Wh
Limited charge voltage: 4.35V
Seems to be the same battery as for a Samsung Galaxy S3
So having tried two replacement batteries in it and having issues I’m giving up with the battery swap! They power the device but won’t charge. When you plug it in to charge the monitor, it shows the battery as full and does not charge. When you unplug the charger it goes back to showing low battery.. The original battery still works and charges fine in it. The ones I tried are the correct spec and look identical in size and connector.. they were from a website called repairoutlet. Could just be a dodgy batch perhaps.. has a part number of EB-L1G6LLU..
That’s a shame. Very odd they won’t charge… What’s the problem with the existing battery? Is it just old and not lasting long enough?
i’ve had the exact same issue. i replaced the usb port, but have tried two replacement batteries (the one inside is a knock-off nokia BL-5C battery as used in no end of old nokia phones) – i tried a high capacity clone and when that didnt charge, i sent it back and ordered a genuine nokia BL5c, the same happens with that too. the battery icon and led look like they are charging (led is blue, icon moves up in increments, but as soon as you remove the usb cable, the battery life drops back down to where it was initially.
putting the original cell in charges normally though. the problem with that is theres only maybe an hour of use before it needs charging again.
so yeah, anyone who figures this out, you’d be doing us all a favour! till then, im going back to the original “5c” battery…
Hello Phil, any chance you have a similar guide for the 3000 unit? Or at least suggest whether I need to hear the front cover as well to reach the screws? Thanks!
I don’t, sorry. I’ve never had the 3000 model and I’m not sure I’d willingly buy a BT monitor again 😀
Hello, do you know the model of display? I need to replace just the display. I just need a reference to search for the display.
I’m afraid I don’t have the monitor anymore. Can you take the old screen out and look for a model number?
Hi Phil
I have followed this guide but after I put it back together I don’t have a display? I get two green lights and a red light but nothing on the screen. Previously the unit was off for about 6 months or so but after a good charge I’ve got the same issue. I tried removing and resorting the battery pack. You any ideas?
Cheers
Check the screen is properly connected and there’s no damage to the cable, connector or board. Not much else I can suggest, I don’t think
Great guide but just wanted to flag that apparently not all models have the same micro usb port…mine has one where the pins are all in one line
Thanks for the info Davide. Did you manage to find a replacement port?
Phil! You legend! I managed to fix 2 monitors with your guide! Beer money sent! Much love! Henry 🙂
Thanks, Henry!
Perfect. Thanks Phil.
I couldnt do the fine soldering and the battery pretty much held no charge anymore, so I just soldered the wired of the charger to the positive and negative battery terminals and removed the battery completely (i was worried it might be a fire risk if my dodgy soldering shorted the battery). This is much much easier, but it does mean you always have to have it plugged in. But a much more DIYable solution.
How do I remove the screen?
Hi there has anyone managed to remove the screen? I need to replace the screen, please urgent!!
Btw Phil thank you for the guide it got me to managing to disassemble the unit!
Phil,
Thank you so much for putting this guide together – monitor successfully repaired.
Beer tokens sent, enjoy!
Many thanks
Thank you Russell! Glad it was useful
Thanks Phil. This was a huge help in disassembling the unit and replacing the USB.
Sadly, I managed to unseat and lose one of the 3-pin devices near the USB.
I have been searching for a circuit diagram that would help me identify the missing device (probably a dual diode). No luck so far.
Does anyone here know what these devices are? Has anyone seen the circuit?
I’ve managed to get the old USB port off but I’m left without any holes to push the new one into as the solder has largely sealed them all. Any advice?
Get yourself a solder sucker to clear it out
Scrap that I’ve sorted it! I’ve got 2 of these monitors (accumulated one from a friend who no longer needed) and tried the older one first in case I screwed it up. It’s gone from totally dead to now working whilst it’s plugged in. When it switches on it comes up with a battery with a cross through it which suggests I’ve either screwed up connections and it won’t charge or the battery is totally dead. Only issue now is that the battery seems to be what remembers the monitor link so when I unplug to move it forgets the camera it was linked to. I’ll see what happens on the second one. This one has only just stopped working so I know battery is fine and it’s 100% just the USB issue.
June 2024 and your article is still helping folks!
I volunteer at a Repair Cafe and got one of these baby monitors in to sort. Disassembled it easily with your instructions. Have removed the broken USB connector and a replacement is on order from eBay. Hopefully a young mum will be pleased that her monitor gets fixed, and one more item stays out of landfill.
Thanks ever so much for sharing your wisdom. 🙂
Glad it helped! Kind of surprised there’s some of these still not in landfill. Well done for fixing it! It’s an expensive monitor and breaks far too easily
Thanks mate. Very small and fiddly job, but it worked!
I noticed there are people selling exactly this repair service on eBay now. Must be a common fault.
It seems so, yeh. Feels like a bit of a design flaw! This post gets a few hundred visits a week so it seems incredibly common
Hi Phil. So I fixed the usb connector following your advice. Then it seemed to work okay for a bit. Now its stopped working again. Screen won’t turn on but it seems to be holding charge. There is one red light and two green lights illuminated to the left of the display. Any ideas what might be causing this and how to get it running again?
If I wanted to replace my speaker, any idea what sort it is that I’d need? Prefer to order one before i take it apart really.
Thanks for the guide! Very similar steps can be used to repair the Motorola Comfort P85U baby monitor unit sold in the US, though when I opened it up the micro USB connector was surface mount and not thru hole, so I had to be super-precise with a very fine tipped soldering iron to attach the new one.
One tip – the two middle traces of the USB connector are for data and don’t actually need to be re-soldered for the unit to charge and function normally.
Here’s the SMT (surface mount) connector I used: https://www.digikey.com/en/products/detail/gct/USB3140-30-0070-1-C/9859644